Showing posts with label Tricks. Show all posts

Sunday, November 10, 2013

Download Torrent files using IDM

Download Torrent files using IDM


Yes, it us possible to download torrent files using Internet Download Manager. But here is a big question that:-

Why will you download torrent files using IDM, if you can download them by using torrent clients such as , utorrent and bittorrent?


So, for me there are two reasons for using IDM to download torrent.
1. If there are less number of seeds, them downloading speed is too slow.
2. Torrent is banned at school, colleges and offices.

There are a lot of websites which allows us to download torrent via IDM.


1. Click [ HERE ] and go to ZBIZ.com website. It will looks like this as shown in the below Screen shot.

download+torrents+with+idm


2. Now Just click on the UPLOAD TORRENT button to browse the torrent file that you downloaded and click on GO.

download+torrents+with+idm


3. You can either Choose Free or Premium account for ZBIZ. From free account you can only download files with memory less than 1 GB, if your file size is more than 1 GB then you have to go for Premium account. CLICK on Free to Proceed.

download+torrents+with+idm


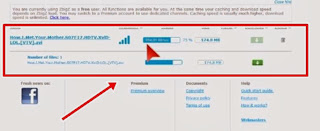
4. Now it will take some time to CACHE your torrent file, and after that you can download the file by clicking on DOWNLOAD button.

download+torrents+with+idm


Putdrive.com is the latest alternative to download torrent files using IDM or to download torrents directly. Using. PutDrive Allows you to download torrent files in fastest way using its amazing features. It even supports anonymous download.

Go to the Site - Put-Drive


download torrent idm


Boxopus.com is lets you to download torrents to your Dropbox directly, even you can download the torrent using IDM if you wish. This works same like the previous shown sites. We should provide link or upload a torrent file and BOXOPUS will create a CACHE and we can download it instantly. The CACHE will be even stored, which helps us to download the torrent file even after some time using IDM.


If have any doubts regarding any of the above discussed issued please comment below and i am always happy to assist you .

Thursday, November 7, 2013

Use Facebook and Youtube at College, School, Office

Use Facebook and  Youtube at College, School, Office


Generally at every school, college or at offices we are having internet but we cannot use facebook or view videos on youtube at that places because the network administrator has blocked that sites. If this happens with you too then here is the way.

For Youtube :-

Step 1 :- Go to this website
Step 2 :- wait 5 seconds and press skip button.
Step 3 :- There you will see a Go button. Click on it.

Thats all...

For Facebook :-

Step 1 :- Go to this website.
Step 2:- Same as for Youtube.
Step 3:- Type  www.facebook.com  in the box.
Step4 :- Press the Go button.

Thats all...


Sunday, October 27, 2013

How to unlock android pattern lock

How to unlock android pattern lock!!!


Sometimes when you enter wrong pattern several times, the phone gets locked and then it asks for the email id and password. If you do not have internet connection activated at that time the only option you have is to go to the service center. But here is another trick, by which you can unlock the pattern. But all you data will be deleted. So remove the sd card before trying this method.

Just Follow the below steps:-

1. Switch Off the Phone.
2. Press the Volume Up button and do not release it.
3. Press the Home Button and also do not release it.
4. Now press the Power Button and when the phone starts just release it.
5. You will now enter in the android secret menu.
6. Use home button to navigate and choose the third option.(DELETE ALL USER DATA)
7. After it is finished, the phone will start as normal.

Thanks.


NOTE :- This method will delete all your data, apps iinstalled.

There is also another way to unlock the pattern. Comment below if you want to know it.

Thursday, August 15, 2013

KEEP MULTIPLE ITEMS IN YOUR CLIPBOARD

Keep Multiple Items in Your Clipboard!!!


Hello Friends!!!

Here I will tell you a very useful tool which is very helpful in Copying and Pasting. Normally we are able to keep only one item at a time in clipboard whether it is a text or image or anything else. If we copy anything else the previous one is gone.

Here is the solution by using it, you can copy multiple items and keep it in clipboard and paste according to your need.

Requirements :

1. ClipX


Download the tool and install it. After installing just copy the items you want to copy. For example copy an image then some text and after it copy another image or any thing you want. When you need to paste any of the copied items just press Ctrl+Shift+V.

Check the System Tray Icon for more options.

Thats All...

Enjoy...!!!!


Thursday, June 20, 2013

How to view locked profile pic in facebook

How to view locked profile pic in facebook


Hello Friends...Have you ever noticed in some Facebook profiles, Profile pictures cannot be opened or maximized. Because these profile pictures are privacy maintained or locked by facebook user. Want to view large size the locked profile picture in facebook.Here is the trick.


Procedure


Step 1 : Open any locked profile picture account, 
Steo 2 : Right click on the image & select Copy image URL.
Step 3 : Paste the copied image link in a new address bar.


Change image resolution to 160*160 to 720*720 .

example

if the link is 

https://fbcdn-profile-a.akamaihd.net/hprofile-ak-snc7/c210.0.540.540/s160x160/486034_336997056414933_360662243_n.jpg

make it

https://fbcdn-profile-a.akamaihd.net/hprofile-ak-snc7/c210.0.540.540/s720x720/486034_336997056414933_360662243_n.jpg


Hit enter and thats all....

Tuesday, May 14, 2013

How to hide/show drives in my computer

Hi Friends...here is a very simple , easy and very interesting trick to hide or unhide drives in my computer in windows .....It is very useful when someone else is using your pc and you have secret/personal data in a disk drive and you donot want that person to see that data....

No Software is required

Follow this simple procedure

Procedure to hide

Step 1 : Right Click on My Computer.

Step 2 : Select Manage.

Step 3 : Click on Disk Management.

Step 4 : Right click on the drive you want to hide.

Step 5 : Choose Change Drive Letter and paths.

Step 6 : Click on Remove.

Thats all....

Your drive is now hidden..Open My Computer and you will not find the drive there..


Now to view the drive again, follow the below procedure.

Procedure to View Drive

Step 1 : Right Click on My Computer.

Step 2 : Select Manage.

Step 3 : Click on Disk Management.

Step 4 : Right click on the drive you want to view/unhide.

Step 5 : Choose Change Drive Letter and paths.

Step 6 : Click on Add.

Thats all...


Enjoy Privacy....

If you like please comment...and share


Lock Computer using usb drive

How to lock your pc using USB Drive


Hello Friends...there is an awesome way to lock your computer...


Here is the interesting and new way to lock your pc in James Bond styple....using usb


Requirements : 

1  Predator.msi


2. Pen drive

Procedure :

Step 1 : DOWNLOAD and install Predator. Download the trial version only(you will see the following screen)


Step 2 : Insert USB and type the password you want(see below screen)


Step 3 : Click on the Create Key button.


Step 4 : Click Ok Button..


Thats all...


Now when you remove the pendrive ....your pc will be locked after 30 seconds...and you will see a message asking for the password... Either enter the password or just insert the pendrive...

Enjoy Locking like James Bond....


Monday, May 13, 2013

Google Search Tricks


Hello Friends!

Here you will find the tricks to search using google efficiently...so that you do not get irrelevant search results.

You can also call it as Search Engine Hacking. It involves using advanced operator-based searching to identify exploitable targets and sensitive data using the search engines.

Special Search Characters:


1. Quotes ["search query"]: Quotes are used to search for specific phrase or set of words.

E.g. The query ["The monk who sold his Ferrari"] will search for the specific phrase —The monk who sold his Ferrari.

2. Minus Sign [-]: The minus sign tells Google search engine to exclude the word that follows the minus operator.

E.g. [-red apple] will display the search results which will exclude the word red.

3.Tilde operator [~]: Adding a tilde operator in front of a word will search for results containing that word as well as even more synonyms.

E.g. [~jokes] will display search results which will include the word jokes as well as its synonyms like funny, humor, etc.

4. OR operator or vertical bar [|]: Using OR (in uppercase) or the vertical bar with two or more keywords, tells Google to search for pages that contain either of the words.

E.g. [Android OR Apple] will display search results containing either of the words.

5. Asterisk operator [*]: The asterisk is a computer symbol for a wildcard, which allows the search engine, such as Google, to fill in that space with any text string. You can also use it within double quotes for more precise searches.

E.g. The query ["today is * day"] will display search results like “today is a good day” or “today is mother’s day”, etc


Other Useful Tricks


link:
The query [link:] will list webpages that have links to the specified webpage. For instance, [link:www.google.com] will list webpages that have links pointing to the Google homepage. Note there can be no space between the “link:” and the web page url.

related:
The query [related:] will list web pages that are “similar” to a specified web page. For instance, [related:www.google.com] will list web pages that are similar to the Google homepage. Note there can be no space between the “related:” and the web page url.

info:
The query [info:] will present some information that Google has about that web page. For instance, [info:www.google.com] will show information about the Google homepage. Note there can be no space between the “info:” and the web page url.

define:
The query [define:] will provide a definition of the words you enter after it, gathered from various online sources. The definition will be for the entire phrase entered (i.e., it will include all the words in the exact order you typed them).

site:
If you include [site:] in your query, Google will restrict the results to those websites in the given domain. For instance, [help site:www.google.com] will find pages about help within www.google.com. [help site:com] will find pages about help within .com urls. Note there can be no space between the “site:” and the domain.

allintitle:
If you start a query with [allintitle:], Google will restrict the results to those with all of the query words in the title. For instance, [allintitle: google search] will return only documents that have both “google” and “search” in the title.

intitle:
If you include [intitle:] in your query, Google will restrict the results to documents containing that word in the title. For instance, [intitle:google search] will return documents that mention the word “google” in their title, and mention the word “search” anywhere in the document (title or no). Note there can be no space between the “intitle:” and the following word.
Putting [intitle:] in front of every word in your query is equivalent to putting [allintitle:] at the front of your query: [intitle:google intitle:search] is the same as [allintitle: google search].

allinurl:
If you start a query with [allinurl:], Google will restrict the results to those with all of the query words in the url. For instance, [allinurl: google search] will return only documents that have both “google” and “search” in the url.
Note that [allinurl:] works on words, not url components. In particular, it ignores punctuation. Thus, [allinurl: foo/bar] will restrict the results to page with the words “foo” and “bar” in the url, but won’t require that they be separated by a slash within that url, that they be adjacent, or that they be in that particular word order. There is currently no way to enforce these constraints.

inurl:
If you include [inurl:] in your query, Google will restrict the results to documents containing that word in the url. For instance, [inurl:google search] will return documents that mention the word “google” in their url, and mention the word “search” anywhere in the document (url or no). Note there can be no space between the “inurl:” and the following word.
Putting “inurl:” in front of every word in your query is equivalent to putting “allinurl:” at the front of your query: [inurl:google inurl:search] is the same as [allinurl: google search].


Thats all...

Enjoy Searching...


Please comment if you like.....


How to format windows quickly

Hi Guys!

This Time we will see trick that you always want , if you have ever formatted your pc.
This Time I will explain How to Install Windows In Just 10 minutes??

Its not a hack...its just a trick...
As We all know that During Formatting a Computer After the File Copying is Completed then windows Require 39 Minutes Time...we can reduce it significantly..

Just follow the below steps....


Procedure :

Step 1 : After the Copy Part is Over ... System is Rebooted.

Step 2 : Now As time starts, you have to Press  "Shift + F10 "  . This Will Open The command Prompt...  

Step 3 : Now type  taskmgr  in it. This will open the Task manager .

Step 4 : When the task manager is opened Goto Processes And Find setup.exe process and Right CLICK on It....

Step 5 : Goto Set Priority and select Highest.

Thats all...


So When you Format your PC Next Time It will Really Save Your TIME i.e around 20 to 25 minutes...

Enjoy formatting....

Sunday, May 12, 2013

Use Trial version for ever

Hi Friends!

Today you are going to see a very useful trick...

If you are having a trail version of a software and its trial period is over...then you cannot use it...

Here we will see how to use a trial version forever...


Requirements :


1. RunAsDate.zip


Steps :


2. Double Click on it.

3. Double click on RusAsDate.exe

4. Choose Run option.


you will see the following screen...


5. Click on the browse button.

6. Choose the executable file of the software you want to run.

7. Select the date on which you want to run

8. Click on the Run button. 


Thats All....


Download Link :-

https://www.dropbox.com/s/ap2h3qg9jbo3adh/runasdate.zip


Your software will run...

Hope you like...


Thursday, May 2, 2013

how to convert videos using vlc


Hello Friends...

Here we are going to see a simple way of converting videos without using any video converter.
VLC is now a very well known music/video player. It has a lot of features. One of the lesser known feature of VLC is that it can also convert videos.
Some users may like this feature that much that they may decide to switch to VLC as their main media player. If you do not have it installed already, you can download it from the official website. It is compatible with Windows, Mac and Linux operating systems, and the conversion options should be available in all versions.
Follow the steps below to convert the videos :
Step 1: Open VLC Media Player.
Step 2: In this screen, click on Add button to select files that you want files to be converted.Click on Convert / Save. Additionally, You can also check on Use a subtitles file if you want subtitles for the converted file.

Step 3: Now select the Destination file and mention the name of the file as per your choice and then select Profile i.e. the format in which you have to convert your Video.
Step 4: Click on Start button and the player will start the conversion of the Source file to the specified format.

Note: It has been observed in windows 7 and Windows 8, VLC convert files in .ps extension, which is a raw file. To convert files in VLC always Open VLC Player in administrator mode, i.e. Right click on VLC icon and select Run as Administrator.

That all...
Hope you have learned a new trick today...

Wednesday, May 1, 2013

How to know who visited your facebook timeline

Hello Friends!


If you want to know who Visited Your Facebook Timeline follow the following steps...

Step 1 :  Go to Your facebook timeline.

Step 2 : Right click on your mouse and select 'View Page Source' or just hit Ctrl+U . 

Step 3 : Press ctrl+F and search for : "ordered_list.top_friends " (without quotes).


You will see a series of profile IDs( like ["100003480320365"] also shown in picture) within quotes.- These are the profile IDs of your friends who visit your timeline more often.

The first id is of the person who visited your timeline frequently  and lhe last is of the person who visited least.

Step 4 : Copy any one profile ID & paste it in the browser's address bar as  www.facebook.com/PROFILE-ID'
and hit Enter to know who is it.


This is the method by which you can find out who visited your timeline.


Thats all...

How to download videos from youtube


Hi Friends!

There are a lot of ways to download videos from the most popular site youtube.
Here we will see some simple ones..

Method 1 : Go to any one of the following websites -
                  http://www.savevid.com/
                  http://www.keepvid.com/

there paste the url of the video from youtube and press the DOWNLOAD button.

There are also other websites which provide the facility to download youtube videos, but I have used these two and they worked well.


Method 2 : Download INTERNET DOWNLOAD MANAGER

It is a very good download manager. It increases the download speed and also can resume the download,
When IDM is installed in our computer it automatically grab all the download links and download them itself.
So when a video is played in youtube, IDM asks you wheather to download it. You just have tot click on the popup of IDM.

The above is the trial version of the IDM . If you want the full version please write in comments below,


I am using the second method.


There are a lot of other softwares available to download youtube videos, but IDM is the best.                


Thats all.....

Monday, April 29, 2013

How to change startup sound in Windows

Hello friends!

Whenever you start your computer or laptop a sound is played when the user logs on.
If you want to change that sound and play your own...perform the following steps:-

Step 1 : Open Control Panel (start->control panel)

Step 2 : Click the Sound and Audio Devices tab.

Step 3 : Click on the Sounds tab and select the sound you want to change from the list at bottom titled                                                                                       "Program events"  (for startup sound select Start Windows).

Step 4 : Click the Browse button and select the sound(music file) of your choice (The sound must be of .wav format)

Step 5 : Click the OK button

Thats all...
Now when ever you will start you computer the sound of your choice will be played.

Tip : 1. Record a welcome message in your own voice using voice recorder and select it as a startup sound.
        2. You can also change other sounds just by selecting the sound you want to change in the Step 3.

Saturday, April 27, 2013

How to Hide/Lock folder in Windows OS without any software

Hi Friends!

Ever wanted to store important data and dont want any body to see it...If yes, continue reading....

If you want to store important data in your computer so that no body can find it.. perform the following steps.


Step 1 : Open Notepad.
Step 2 Copy the below text and paste in the opened text file.

cls
@ECHO OFF
title Folder Locker
if EXIST "Control Panel.{21EC2020-3AEA-1069-A2DD-08002B30309D}" goto UNLOCK
if NOT EXIST Locker goto MDLOCKER
:CONFIRM
echo Are you sure u want to Lock the folder(Y/N)
set/p "cho=>"
if %cho%==Y goto LOCK
if %cho%==y goto LOCK
if %cho%==n goto END
if %cho%==N goto END
echo Invalid choice.
goto CONFIRM
:LOCK
ren Locker "Control Panel.{21EC2020-3AEA-1069-A2DD-08002B30309D}"
attrib +h +s "Control Panel.{21EC2020-3AEA-1069-A2DD-08002B30309D}"
echo Folder locked
goto End
:UNLOCK
echo Enter password to Unlock folder
set/p "pass=>"
if NOT %pass%==ajay goto FAIL
attrib -h -s "Control Panel.{21EC2020-3AEA-1069-A2DD-08002B30309D}"
ren "Control Panel.{21EC2020-3AEA-1069-A2DD-08002B30309D}" Locker
echo Folder Unlocked successfully
goto End
:FAIL
echo Invalid password
goto end
:MDLOCKER
md Locker
echo Locker created successfully
goto End
:End


Step 3 : Search for ajay in this file and replace the password "ajay"  with the password you want to give.
Step 4 : Save the file as LOCKER.bat  (you can give any name but .bat is essential)


Now double click on the saved .bat file (Locker.bat ). First time it will create a new folder "Locker". Put your data into it. Now to lock/hide the folder again double click the Locker.bat file, it will ask for confirmation...press y  and enter. The newly created folder Locker in which you put your data will be hidden. (If it renames to control panel just refresh).

This folder(Locker ) and your data will still be stored at the location where you saved but it will not be visible ...even the Search of Windows will not be able to search it.

In order to see the folder again, double click the Locker.bat file... this time it will ask for password. Type the password which you changed and press enter.

Repeat the process whenever you want to hide/show the folder.

In case of any problem please write in comments...

Thats all.....
Enjoy....

How to change the text of "Start Button"

Hello Friends...


If you are using Windows XP and  a little bit creative , you would have definitely thought of changing the text of start button...and if you want to do that...just keep on reading...

For doing this there are a lot of ways...We are going to see the simplest of all...


Just download the simple, light weight utility Start Button Caption


DOWNLOAD

With Start Button Caption you can easily set the start button text of Windows XP.

After downloading, double click on StartB.exe and type the name you want.

Thats all....
Enjoy...

How to change the text of "Start Button"

Hello Friends...

If you are using Windows XP and  a little bit creative , you would have definitely thought of changing the text of start button...and if you want to do that...just keep on reading...

For doing this there are a lot of ways...We are going to see the simplest of all...

Just download the simple, light weight utility Start Button Caption

DOWNLOAD

With Start Button Caption you can easily set the start button text of Windows XP.

After downloading, double click on StartB.exe and type the name you want.

Thats all....
Enjoy...

Thursday, April 25, 2013

How to create an undeletable folder


Here we are going to see how we can create a new folder in windows that can not be deleted.
We do not require any software for this. Just some simple steps and thats all.
Follow these basic steps...


  1. Open "run"(Start Menu->Run)
  2. Type "cmd" (without quotes).
  3. Go to the location where you want to save the folder (using basic commands of command prompt like 'cd' or 'cd..')
  4. Type "md con\" (without quotes).  ("md" stands for make directory)


Hurrrray Done.....

A folder named "con" is created. It is undeletable.


Now to delete that folder..(You must be thinking if it is undeletable how can we delete it???? Here Undeletable means cannot be deleted as normally we do)

Follow the above steps upto step 3 and Just replace the "md" in step 4  with "rd". ("rd " stands for remove directory)

Thats all.....
The folder is removed.

Write in commnets in case any help is required.

Thankyou

Delete Undeletable File in Windows


How to delete undeletable files in windows?
You would have many times run into a situation where you wanted to delete a file, but Windows  didn’t allow you to do it. These thing have happened with me several times.
This happens because explorer.exe locks the files which are in use, Usually, such files should not be deleted but situations may arise when you need to delete the files.
Fortunately, there are a few easy solutions to delete the undeletable files.
 1st Mehod : Kill explorer.exe
  1. Open the command prompt
  2. Go to the location where the locked file is(using basic commands of cmd like cd and cd..)
  3. Open the task manager (ctrl+alt+del  or right click on task bar and select 'start task manager' )  , select the Processes tab
  4. Right click on the explorer.exe process and select “End Process” button
  5. Go back to the command prompt and type "DEL <filename>" without quotes and replace <filename> with the name of the file you want to delete.
  6. Bring up the task manager windows again
  7. Select file->new task
  8. Type explorer.exe in the “create new task” field
  9. Press OK.
 Method 2 : Use unlocker (Need software)
Unlocker is a very useful freeware that will allow you to unlock any files that are currently in use by Windows. You’ll know if this is happening if you are getting any of these messages when trying to delete a file:
    • Cannot delete file: Access is denied
    • There has been a sharing violation
    • The source or destination file may be in use
    • The file is in use by another program or user
    • Make sure the disk is not full or write-protected and that the file is not currently in use
Unlocker will make things right again for you.
You’ll notice that right after installing the software, a new option named “unlocker” will appear when right clicking any files or folders in Windows Explorer. To unlock a locked file, just right click it, select unlocker, and the unlocker software will start. Then, click “unlock all” and close the software. Now that your file is unlocked, just delete it in Windows Explorer, as you always do.


Hope you are happy now...